
SIDE ADDITION
 Side yard before construction.
 Excavation is tricky on this home because the existing home footings aren't as deep as the new addition is going to be.
So if we were to excavate below the existing footing, the soil could give way and this side of the house would cave in.
Oh, what to do?

When the pier hits solid soil, the drilling extension is cut and bolted to the bottom of the footing.
Once all 6 are done, we can then excavate without the risk of collapse.
Is that cool or what?
 A larger tractor could have been used but would have destroyed the front landscaping and a large pine tree would have had to be removed.
We decided to use a smaller tractor and conveyer belts.
A series of two conveyer belts were used to drop the load right into the truck.
 Most of the excavation is now done and the top of the 15 foot long piers are shown holding up the side of the house.
That basement window will soon be a door into the existing basement and the large window above will be a walk way into the new addition.
 Footings are poured with a bunch of steel rebar.
 Foam block foundation was selected for its ease of use and insulation. Electrical is cut into the foam and sheetrock is screwed right to it. No need to frame interior walls that make the room smaller.
Foundation plaster with chicken wire finishes the exterior.
Cement is pumped up over the top of the huge pine tree into the foam block cavities with tons of steel.
 Hurray...the framing finally starts.
 Cement is pumped in for the basement floor.
We capped the helical piers with a foundation wall that now supports the floor joists above.
We cut out a basement window on the left and changed it to a doorway with steps up to the shorter existing basement.
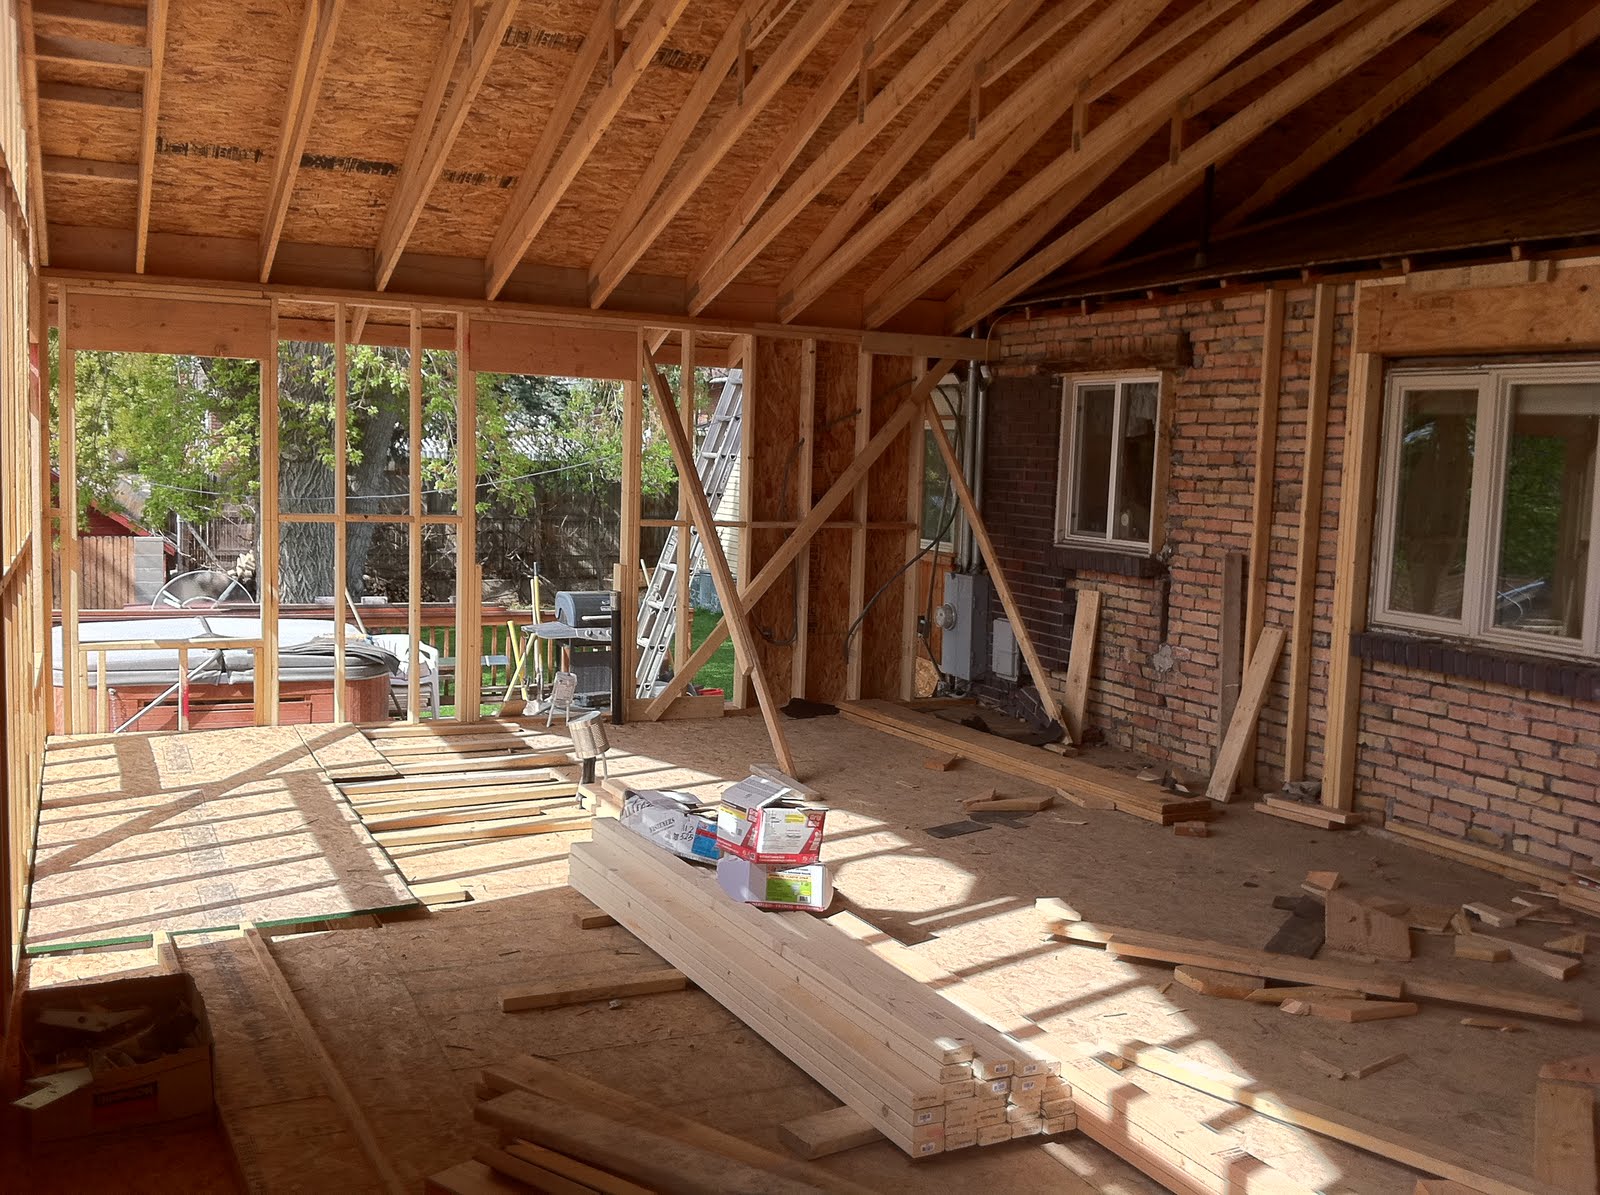
 Walls and vaulted trusses go up fast.
 The roof is now sheeted.
 The new roof and the old are joined together.
The exterior brick is stripped and cleaned to be reused on the front. This will make it look like the original house.
 The exterior walls are sheeted.
Notice how the two roof lines match up?
I know...I'm good.
 We added 5-skylights for added light. Some of them are operable for ventilation.
Plumbing, electrical and sheetrock are now done.
 We reused the original brick that was on the side of the house. Now it doesn't look like an add-on or an after-thought.
 Cement-board siding was used on the side and back for low-maintenance.
 Cabinets and hickory flooring are going in.
 Floors are finished and look great.
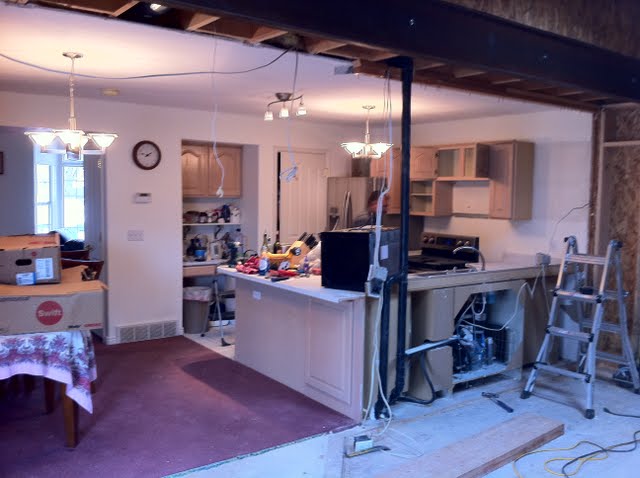
SUSPENDED ADDITION
This addition was a lot of fun because we got to use steel columns and I-beam to support a second story kitchen addition.


So if we were to excavate below the existing footing, the soil could give way and this side of the house would cave in.
Oh, what to do?

My awesome engineer, Jeff Ambrose at Structural Design Studio had the perfect answer.
Helical piers will be drilled down under the house footings into solid soil and bolted to the bottom of the footing.
When the pier hits solid soil, the drilling extension is cut and bolted to the bottom of the footing.
Once all 6 are done, we can then excavate without the risk of collapse.
Is that cool or what?

We decided to use a smaller tractor and conveyer belts.
A series of two conveyer belts were used to drop the load right into the truck.

That basement window will soon be a door into the existing basement and the large window above will be a walk way into the new addition.


Foundation plaster with chicken wire finishes the exterior.
Cement is pumped up over the top of the huge pine tree into the foam block cavities with tons of steel.


We capped the helical piers with a foundation wall that now supports the floor joists above.
We cut out a basement window on the left and changed it to a doorway with steps up to the shorter existing basement.


The exterior brick is stripped and cleaned to be reused on the front. This will make it look like the original house.

Notice how the two roof lines match up?
I know...I'm good.

Plumbing, electrical and sheetrock are now done.


SUSPENDED ADDITION
This addition was a lot of fun because we got to use steel columns and I-beam to support a second story kitchen addition.
This home needed a stout beam to hold the upstairs but we didn't want to lose head height with an 18" tall wood beam. The answer was to use a steel I- beam but even that would be 12" tall. Oh what to do? Most contractors would have put the beam under the joists which would have hung down from the ceiling a foot. We decided to go a different route. We remounted the 2x10 outside joist ribbon down 1/2" to allow for the top flange of the I-beam to slip over it then bolted the ribbon to the I-beam webbing. The end result is just 2 1/2" down from the ceiling. Cool huh?


 Skylights added.

Then we added a deck and a roof to cover it all. We matched up the stair landing height with the door to the garage to make it all flow.
-----------------------------------------------------------------------------------------